Spirit Halloween Ghostbusters Proton Pack Lighting Upgrade and other mods…
Spirit Halloween recently released a pretty nice proton pack replica for a really good price. There are a few issues that I have with it though. The lighting they included is not very good and there are some real issues with the way the wand is mounted. These issues needed to be fixed!
I had a bunch of extra components lying around from the full proton pack so I got to wiring. I wanted the standard powercell and cyclotron animations while I walk around. I kept the flashing light in the powercell when firing the wand but removed them on the cyclotron. The result can be seen here:
The full Arduino code, 3d models, and diagrams for this mod have been added to my github repo and you can find it here:
https://github.com/CountDeMonet/ArduinoProtonPack/
The setup uses just a few components. The components used total $45 but there is enough here to light 2 packs fully. With one more stick you could light 3:
- Optional power converter set to 5V output: 6 for $9.69
- Arduino Nano: 3 for $11.86
- Two neopixel sticks for the powercell
- Four Individual Neopixel for the cyclotron: 100 for $15.88
Here is a fritzing diagram of the whole setup with the power converter. It’s a pretty simple design:
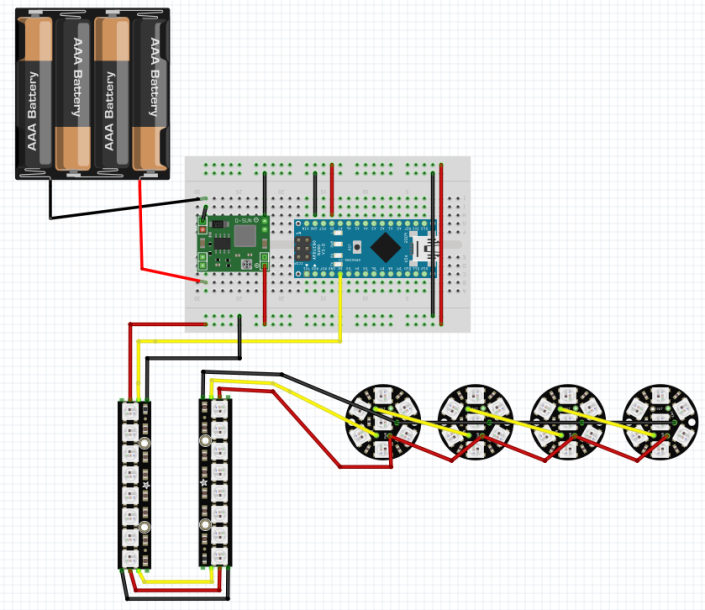
For my pack I’ll be using an old 11.1v 1800mah lipo I had laying around. You could easily use 4 AAA’s as well for this setup and they would last a long time. Something like this: https://www.amazon.com/Sackorange-Batte … B071ZQ3DGT would work well if you wanted to use that.
I like to use the power converter set to 5v output as the neopixels like more stable voltage than the 5v out on the arduino can handle. It allows you to go brighter with the neopixels. You could simplify this even more and remove the converter and use the arduino vin to take in the battery. This whole setup can be easily soldered together since it only uses 2 pins on the arduino.
I also cut up some red and blue transparent folders to upgrade the light windows. Here are some pictures of the board I made and the installation. I created a few models for 3d printing to make the installation easier. Those are also included in the github repo and on Thingiverse
I installed everything with hot glue. Easy and effective. It was a pretty easy install. I did push the existing circuit board out of the way and removed the bottom one completely. The top one is needed if you want to use the existing sounds and wand features.


I also made a few other quick updates. I added a V-Hook and gun track which you can find in the github repo


I also replaced that awful ribbon cable with a 40 pin cable
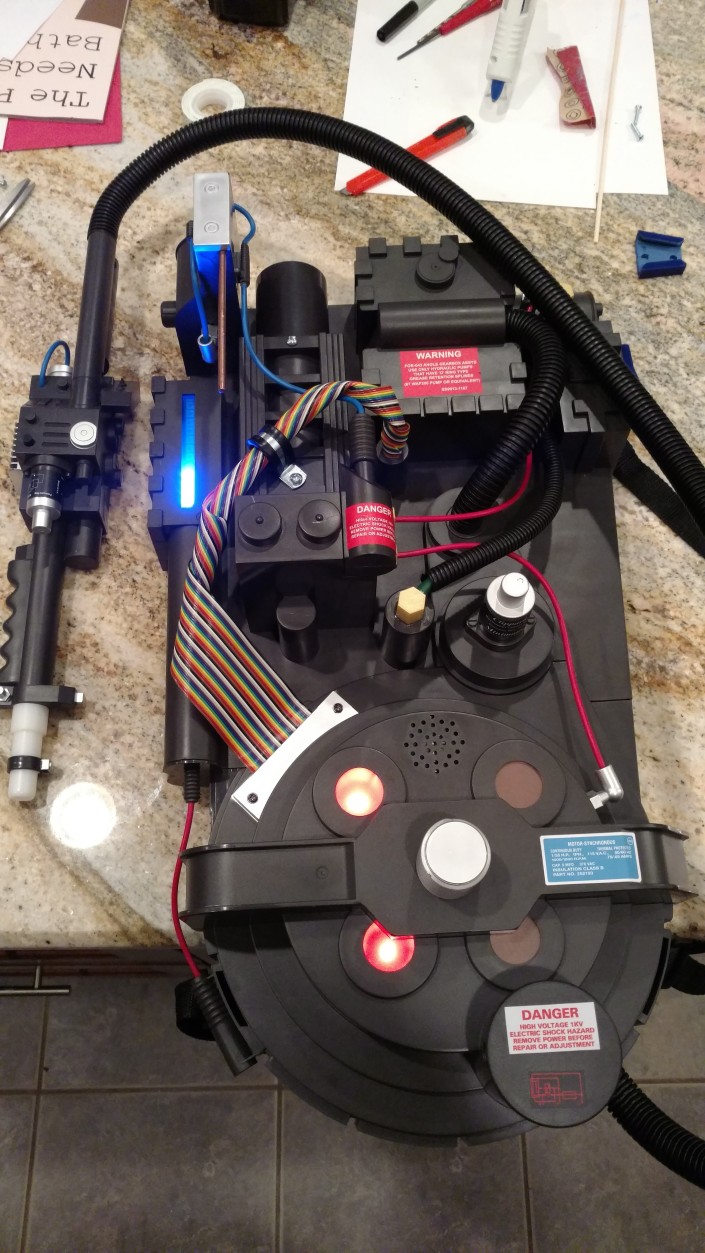
Finally, I added an ALICE frame. Just installed with zip ties and 2 small holes


It looks pretty good now for about $100 invested. 
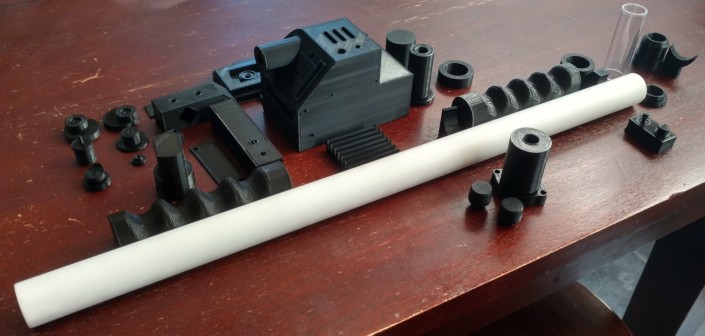
The next step is to replace that really small wand with a 3D Printed one. I’ve added the models needed for the proper scale wand to Thingiverse and the printing is already complete.
I won’t get this done before Halloween though. Maybe next year…
