3D Printing a PKE Meter
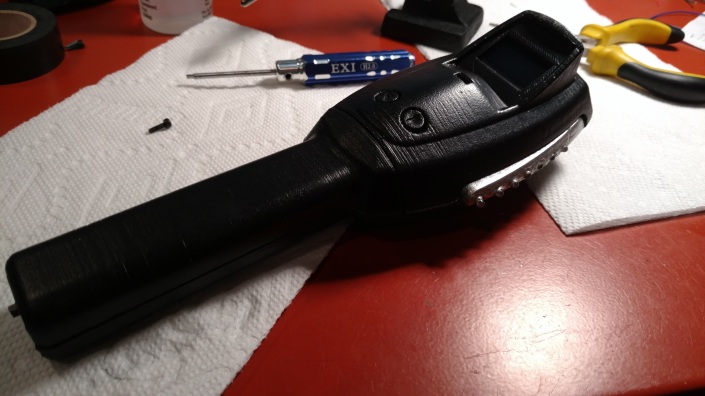
My son has decided that he wants to be a Ghostbuster for Halloween and I have my work cut out for me. I found a number of plans on Thingiverse for proton packs, traps, and PKE Meters and decided I’d take a crack at one of them. I originally thought the PKE Meter would be the easiest so I decided to start with that. About a month later I’ve completed it and it looks like this
This is now, let’s step back a month and see where it all began. Right away I knew this was not going to be 100% screen accurate. My goal is to make a fun prop for my son that allows him to pretend to track ghosts. After looking over some of the existing models on Thingiverse I settled on this one to base his prop off of. It looks a good bit like the one on screen and I really liked the single servo design. I printed out a test one on my Davinci Mini 3D printer and it came out well but it was clear the original size was way to small for all of the electronics I was planning. I decided to scale it up to 110%, remove some of the buttons from the face, and had to create new battery mounts for the 4 AAA’s that are powering this thing.
For simplicity I chose some cheap Arduino Nano’s from Amazon as the brain, some existing LED’s, Buzzer, Buttons from an Arduino starter kit, a LCD screen from Amazon, and an old servo from a crashed RC airplane as the electronics.
Using a breadboard I was able to get everything working the way I wanted.

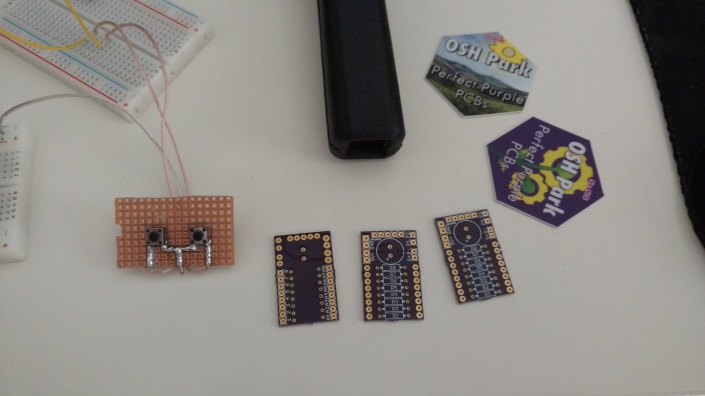
Now it is time to minify everything. I designed a PCB to handle the LED’s and provide a second 5v power rail. I originally thought I would need the capacitor for the servo but ultimately decided on a buck converter to power the servo separately. I ordered my PCB from OshPark and they were amazing as always. It would be even smaller without the capacitor space but it’s still pretty small. I really love the service OshPark provides. They had 3 of these boards to me within 3 weeks for $5. I also hand built the button input board while I was waiting.
The next trick was getting everything into the shell. I’ll let the pictures speak for themselves. I only wish I had used servo wire for the wings. The wire I had available is a bit too rigid for my liking. Other than that the install went well.


I’m really pleased with how everything turned out.
