Arduino
“Finishing” a Star Wars Astromech Droid
About 11 months ago I started this journey to build a Star Wars droid. It’s crazy to see it “finished”. I put that in quotes because are these things ever really finished?
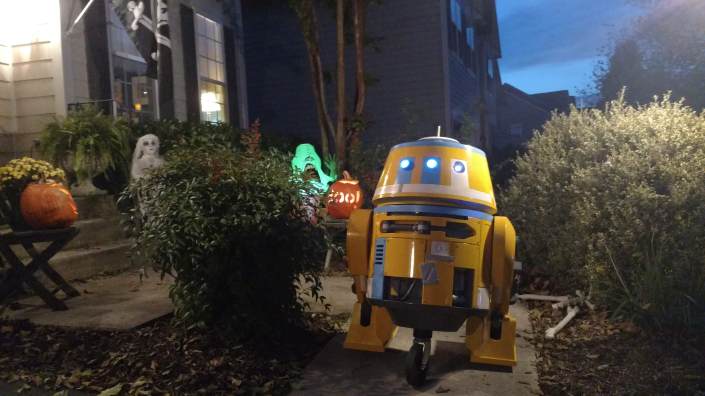
Meet EM-3T or Emmett. He’s a cranky little Astromech droid but he’s really good at his job repairing X-Wing and Y-Wing fighters.
All code, models, and designs for Emmett are on my github site.
https://github.com/CountDeMonet/ArduinoAstromechControlSystem
https://github.com/CountDeMonet/ArduinoChopperDomeLighting
Check it out for more information.
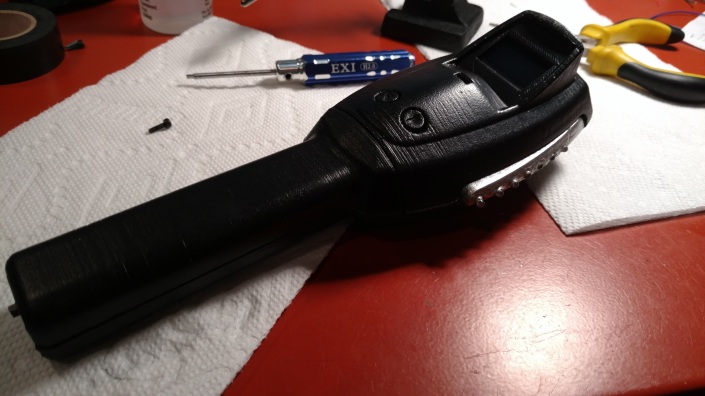
Repairing Saitek Pro Flight Switch Panel with Arduino
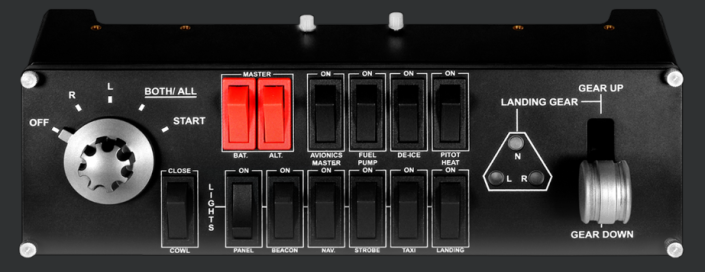
The Saitek Pro Flight Panels were awesome. I bought all of them years ago and they worked great… with Windows 7 and USB 2. Unfortunately when I upgraded my computer everything stopped working due to Windows 10 and all USB3 ports. I have followed every guide, every driver, every bios setting I could find and I can’t get any of the panels to function. I’ve been able to get the radio panel and multi panel working with Spad.NEXT but the switch panel refuses to function. I can only assume something on the circuit board has gone bad. Now that Logitech has bought Saitek this thing is basically a brick with no support. Really without Spad.NEXT all three would be bricks as the Logitech software does not work at all. I really want my simulator to work again so I set off to figure out how to fix switch panel.
TL:DNR – Check out my video of it in action and view the code on github
Read on to see how I did this.
Latest Project: Star Wars Astromech Droid
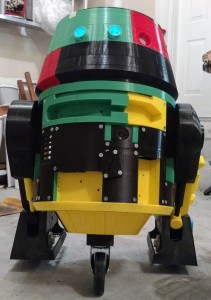
Back in December I was looking for the next project after the proton pack. I knew I wanted to build a robot but I wasn’t sure what I wanted to do. R2D2 seemed like a lot of work and then I found some files for Chopper from Star Wars Rebels. He’s a bit shorter than R2 and I wouldn’t have to worry about trying to replicate a perfect chrome dome. After a lot of reading and joining the astromech.net forums I started printing. All in all over 15 rolls of 2 pound filament was used. I did learn a few tricks to speed up the process.
Read more to see design videos, links to source code, stl’s for printing, and more
Spirit Halloween Ghostbusters Proton Pack Lighting Upgrade and other mods…
Spirit Halloween recently released a pretty nice proton pack replica for a really good price. There are a few issues that I have with it though. The lighting they included is not very good and there are some real issues with the way the wand is mounted. These issues needed to be fixed!
I had a bunch of extra components lying around from the full proton pack so I got to wiring. I wanted the standard powercell and cyclotron animations while I walk around. I kept the flashing light in the powercell when firing the wand but removed them on the cyclotron. The result can be seen here:
The full Arduino code, 3d models, and diagrams for this mod have been added to my github repo and you can find it here:
3D Printing a Proton Pack! Plus Lights and Sounds
What started as just the Neutrino Wand has turned into building a full pack for my son this Halloween. The goals were pretty simple. Replicate the movie pack as best as I could, keep it low weight, and give him some stuff to play with. Here is what I came up with…
The result is about 80% scale, around 8 pounds on the back, and completely mirrored as my son is left handed. The pack is 3D printed using a PVC backpack frame and some other odds and ends to finish it off. The lights and sounds are based off an Arduino Nano that is controlling a bunch of Neopixel LED’s and an Adafruit Audio FX Board. The entire code, models, and PC boards used can be found on github here:
3D Printing a PKE Meter
My son has decided that he wants to be a Ghostbuster for Halloween and I have my work cut out for me. I found a number of plans on Thingiverse for proton packs, traps, and PKE Meters and decided I’d take a crack at one of them. I originally thought the PKE Meter would be the easiest so I decided to start with that. About a month later I’ve completed it and it looks like this